Table of Contents
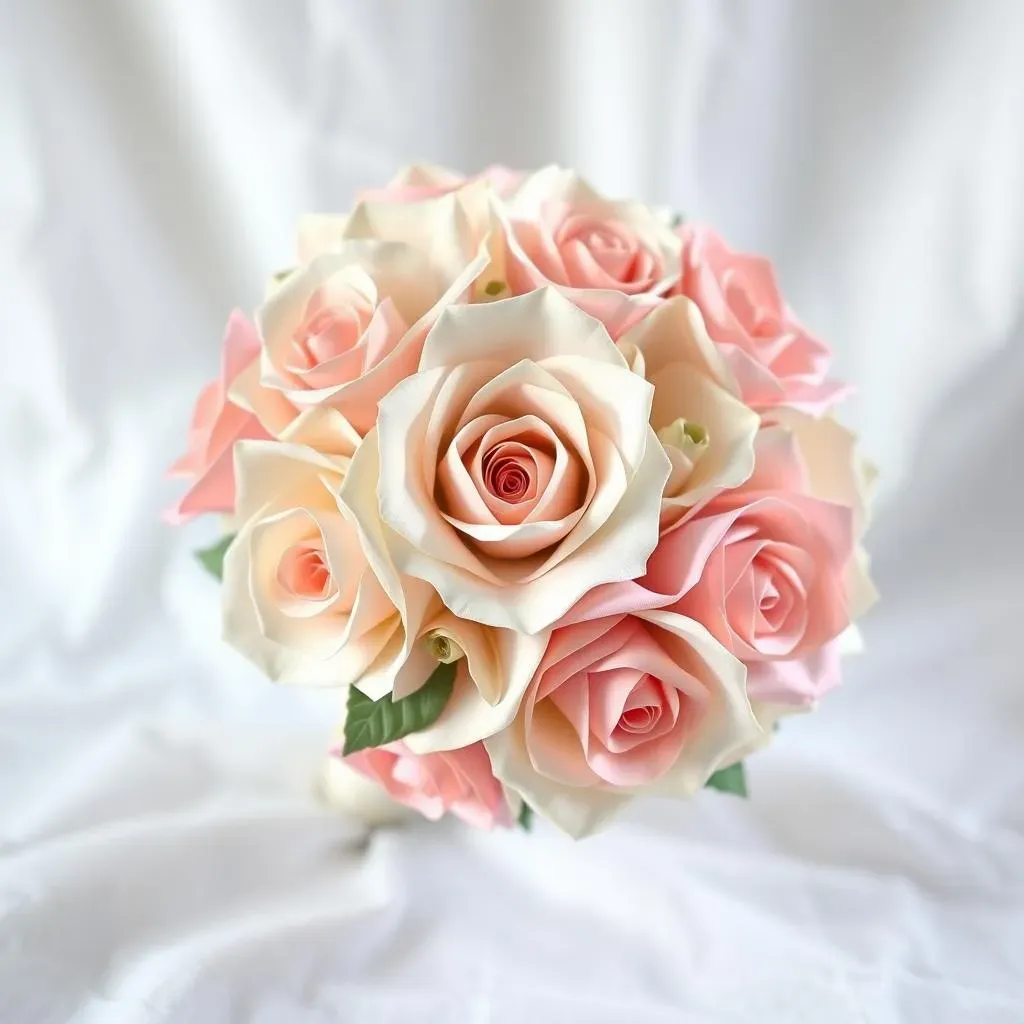
Dreaming of a unique and unforgettable wedding bouquet without breaking the bank? Then you've come to the right place! This article is your complete guide to creating a breathtaking DIY paper rose wedding bouquet. Forget wilting petals and hefty florist bills – we'll walk you through every step, from gathering the essential materials to assembling your stunning floral masterpiece. Learn how to craft elegant paper roses that will last a lifetime, preserving a beautiful memory from your special day. We'll cover everything you need to know, from choosing the right paper and tools to mastering the art of petal shaping and bouquet construction. Whether you're a seasoned crafter or a complete beginner, this detailed tutorial will empower you to create a truly personalized and gorgeous DIY paper rose wedding bouquet. Get ready to unleash your creativity and say "I do" to a stunning, budget-friendly, and everlasting bouquet!
Crafting Your DIY Paper Rose Wedding Bouquet
Crafting Your DIY Paper Rose Wedding Bouquet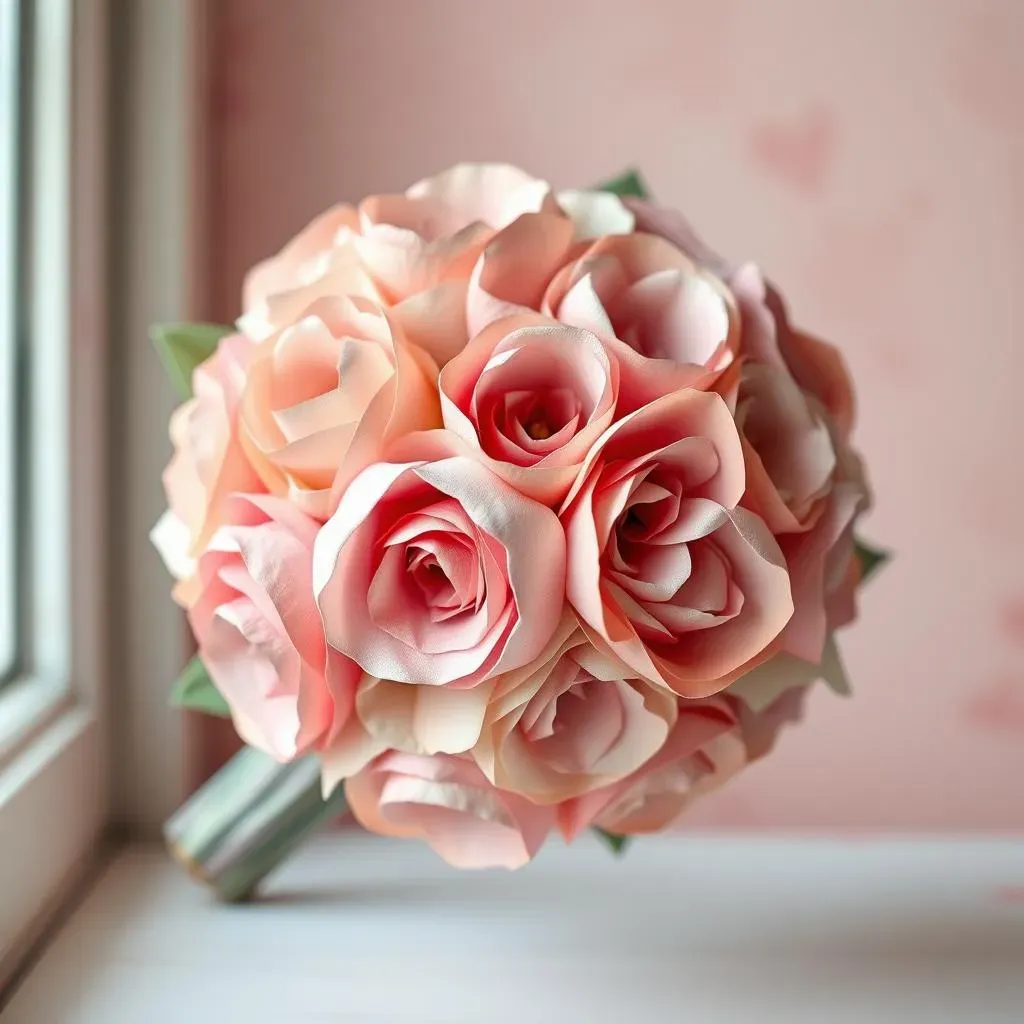
Choosing Your Paper
The paper you select is crucial for the look and feel of your final bouquet. Think about the overall style of your wedding – is it rustic and romantic, modern and minimalist, or perhaps something more whimsical? Heavier cardstock will create more structured roses, perfect for a formal setting, while thinner crepe paper lends itself to softer, more delicate blooms ideal for a bohemian or vintage theme. Experiment with different colors and textures to find the perfect match for your wedding vision. Don't be afraid to mix and match! Consider using patterned paper for a unique touch.
Remember, the color of your paper will significantly impact the final look. Soft pastels create a delicate and romantic feel, while bolder shades offer a more dramatic effect. Think about your wedding color scheme and choose papers that complement your overall aesthetic. You can even use different shades of the same color to create a beautiful ombre effect.
Paper Type | Pros | Cons |
|---|---|---|
Cardstock | Durable, structured roses | Can be less flexible, more difficult to curl |
Crepe Paper | Soft, delicate roses, easy to shape | Less durable, can tear easily |
Designing Your Rose Petals
Once you've chosen your paper, it's time to get creative with your petal designs! You can find countless free templates online, or you can design your own. Consider the shape and size of your petals – wider petals will create fuller roses, while narrower petals will result in a more elegant look. Experiment with different petal shapes to achieve the desired effect. You can also add details like veins or subtle shading to give your roses more depth and realism.
Don't underestimate the power of petal layering! Overlapping petals add volume and dimension to your roses. Experiment with different layering techniques to create unique and interesting blooms. Consider using a combination of different sized and shaped petals to achieve a more realistic look.
- Use templates for consistent petal sizes.
- Experiment with different petal shapes (round, pointed, etc.).
- Add subtle details like veins or shading.
Assembling Your Roses and Bouquet
With your petals prepped, the fun part begins! There are many ways to assemble your paper roses, from simple rolled designs to more intricate layered creations. Many tutorials are available online, guiding you through the process step by step. Don't be afraid to experiment with different techniques and find what works best for you. Once you've created your roses, it’s time to arrange them into a beautiful bouquet.
Consider the overall shape and size of your bouquet. Do you want a cascading bouquet or a more compact and rounded design? Experiment with different arrangements until you find one that you love. Remember to add greenery and other embellishments to complement your roses and complete your bouquet. A touch of ribbon or lace can add a beautiful final touch.
Essential Materials for Your DIY Paper Rose Wedding Bouquet
Essential Materials for Your DIY Paper Rose Wedding Bouquet
Choosing the Right Paper
Let's talk paper! The type you choose dramatically affects your roses' final look and feel. Heavier cardstock gives you crisp, structured roses – perfect for a formal wedding. Think elegant, sophisticated blooms. Crepe paper, on the other hand, creates softer, more delicate roses, ideal for a romantic or bohemian vibe. It's all about finding the right paper to match your wedding's style.
Don't forget about color! Soft pastels create a romantic feel, while bold colors make a statement. Consider your wedding's color scheme and choose papers that complement it. You can even mix and match shades for a unique ombre effect. Think outside the box! Experiment with patterned paper or even use recycled materials for an eco-friendly touch.
Paper Type | Best For | Consider |
|---|---|---|
Cardstock | Structured, formal roses | Weight and texture |
Crepe Paper | Delicate, romantic roses | Color variations and patterns |
Gathering Your Tools and Supplies
Now for the tools! You won't need a ton of fancy equipment, which is one of the best things about this project. A good pair of sharp scissors is essential for precise cutting. A glue stick or hot glue gun (adult supervision required!) will hold your petals together. Floral wire and tape are crucial for shaping and assembling your roses and creating the bouquet's stem. If you're using templates, a printer is helpful, but you can also trace them by hand.
Depending on your design, you might also need additional supplies. Consider adding embellishments like beads, glitter, or ribbon for extra flair. Think about any greenery you want to incorporate – you can buy artificial leaves or even use real dried foliage. And don’t forget a sturdy vase or container to hold your finished bouquet!
- Sharp Scissors
- Glue Stick or Hot Glue Gun
- Floral Wire & Tape
- Printer (optional)
- Embellishments (optional)
- Artificial or Dried Greenery
- Vase or Container
Don't Forget the Finishing Touches!
Once you have your roses made, you’ll want to think about the finishing touches that will truly make your bouquet stand out. Consider adding some greenery to create a more natural look. You can use faux leaves or even dried flowers for a unique touch. A touch of ribbon or lace can add elegance and sophistication, while colorful beads or glitter can add a bit of sparkle.
The final step is to assemble your bouquet. There are many different ways to do this, so feel free to experiment and find what works best for you. You can use floral tape to secure the roses together, or you can use a wire frame for extra support. Remember to take your time and have fun with it! The most important thing is that you create a bouquet that you love.
StepbyStep Instructions: Assembling Your DIY Paper Rose Wedding Bouquet
StepbyStep Instructions: Assembling Your DIY Paper Rose Wedding Bouquet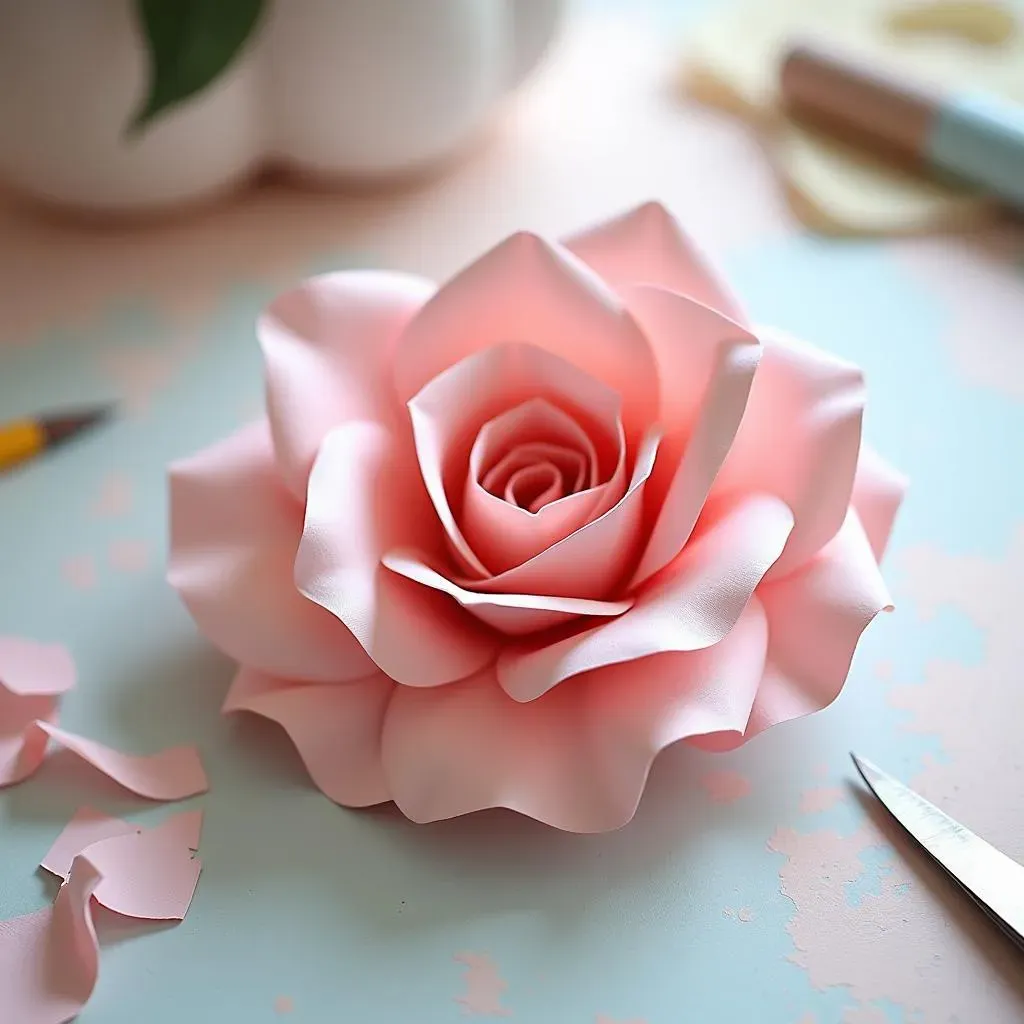
Creating the Paper Roses
Alright, let's get those paper roses blooming! Start by gathering your cut petals. Remember, consistent petal sizes are key for a professional look, so using templates is a lifesaver. Take each petal and gently curl the edges inwards using your fingers or the blunt end of a scissor. This adds a touch of realism and softens the look. For a more pronounced curl, you can use a stylus or even the edge of a spoon. Experiment to find what works best for your paper type.
Now comes the assembly! Apply a small amount of glue to the base of one petal, then carefully attach another petal, slightly overlapping the first. Continue adding petals in a circular pattern, ensuring each petal overlaps the previous one. As you add more petals, gently shape the rose, creating layers and curves. Don't be afraid to adjust the petals as you go, creating a natural, uneven look rather than a perfectly symmetrical one. The more uneven it is, the more realistic it will appear.
Step | Action | Tip |
|---|---|---|
1 | Curl petal edges | Use fingers or a tool for tighter curls |
2 | Glue petals together | Overlap petals slightly |
3 | Shape the rose | Aim for a natural, uneven look |
Assembling the Bouquet
Once you've crafted a bunch of beautiful roses, it's time to assemble your bouquet! Start by gathering your completed roses and any greenery you'll be using. If you're using floral wire, wrap it around the base of each rose to create a stem. This will help hold the bouquet together. Then, start arranging your roses and greenery, creating a balanced and visually appealing arrangement.
Consider the overall shape and style of your bouquet. Do you want a cascading bouquet, a round bouquet, or something more unique? Experiment with different arrangements until you achieve the desired look. Don’t be afraid to add some filler flowers or embellishments to enhance the bouquet's beauty. Once you're happy with the arrangement, secure the roses together using floral tape. This will hold everything in place and create a professional finish. And there you have it - your very own DIY paper rose wedding bouquet!
- Wire the roses to create stems.
- Arrange roses and greenery.
- Secure with floral tape.
- Add embellishments (optional).
Tips and Tricks for a Stunning DIY Paper Rose Wedding Bouquet
Tips and Tricks for a Stunning DIY Paper Rose Wedding Bouquet
Mastering the Art of Petal Shaping
The secret to realistic-looking paper roses lies in the petals! Don't just cut them out and glue them together. Take your time to gently curl and shape each petal. Experiment with different techniques – use your fingers, the blunt end of a scissor, or even a bone folder for more defined curves. Vary the curl on different petals for a more natural look; some petals can be tightly curled, others only slightly. Remember, asymmetry is your friend here! Perfectly symmetrical roses look artificial. Aim for a slightly uneven, organic feel.
Consider adding subtle details like veins or shading to your petals. You can use a pen, pencil, or even a dry-erase marker to lightly draw veins onto the petals, adding depth and dimension. For shading, consider using different shades of the same color or even a darker color on the edges of the petals to create a more three-dimensional effect. Don't be afraid to experiment and find what works best for your style and paper type. A little extra effort goes a long way!
Technique | Description | Effect |
|---|---|---|
Finger Curling | Roll petals between fingers | Soft, gentle curl |
Scissor Curling | Use blunt end of scissors | More defined curl |
Bone Folder Curling | Use bone folder to create sharp creases | Crisp, structured curl |
Adding the Finishing Touches for a Professional Look
Once your roses are assembled, it’s time to think about the finishing touches that will elevate your bouquet from homemade to breathtaking. Consider adding greenery! Faux greenery is readily available and easy to work with, providing a natural backdrop for your roses. Experiment with different types of greenery – ferns, eucalyptus, or even ivy – to find what complements your roses best. You can also add small filler flowers, like tiny paper daisies or forget-me-nots, to add texture and visual interest.
Don't underestimate the power of ribbon and embellishments! A simple satin ribbon can add elegance and sophistication, while a more rustic burlap ribbon can create a bohemian feel. Consider adding small beads, pearls, or even glitter for extra sparkle. The key is to choose embellishments that complement your wedding's overall style and color scheme. A little bit of sparkle or texture can go a long way in making your bouquet truly unique and memorable. And remember, less is often more when it comes to embellishments. Let the beauty of your paper roses shine through!
- Use high-quality floral tape to secure everything tightly.
- Consider adding a decorative handle or wrap to the bouquet's base.
- Store your finished bouquet in a cool, dry place to preserve it.